Wednesday, December 19, 2012

Wicked Creative

-->
Retro Machine created by Napping Goat Design

I received a huge compliment the other day {at least I took it as a huge compliment!} A friend told me I was ‘wicked creative.’   
I don’t think it was the exact words that meant so much, but more that the comment was so meaningful because it totally caught me off guard.

I had no idea my friend had looked, or would ever look, at my blog.   I think I mentioned the blog once in a brief conversation and I had no idea he was actually paying attention.  

The comment had a big impact for being two simple words.

The comment was unexpected and flattering.  The comment came at a time when I must have really needed to hear it.  That might sounds silly, but it is so true.  It caused me take a step back and realize that maybe I do have a talent.   The comment also caused me to recognize I don’t give myself much credit at times.  I sometimes find myself disappointed with my lack of creativeness or lack of ideas or lack of motivation.   I suppose it all comes down to confidence in myself and my creative abilities.  

Sometimes all it takes is an unexpected compliment.  A friendly reminder, maybe I am talented.   Who knew a simple compliment could mean so much and cause such thought!

The next time I’m feeling ‘lacking’ I am just going to say the words and maybe it will be the motivation I need to press on: ‘Wicked Creative.’ 

At the very least, it will make me smile!   

Thank you, dear friend, for the compliment!  


Wednesday, December 12, 2012

Advent Idea for Kids: Book A Day

-->


My Mom had a great idea this year for an Advent calendar for little man.  A book a day.   

I’m not sure if she came up with the idea herself, or read it somewhere, but either way, I give her all the credit.  She wrapped up 24 books and each morning little man gets to open the package with the number that corresponds with the day. 


Seriously, a brilliant idea.  


I figured he would enjoy this, but I had no idea just how much he’d love it.  He wakes up each morning wanting to open the book for the day.  He remembers what number we opened the previous day and he knows what the current day is.  If anything, this ‘advent calendar’ is a great way to practice numbers and counting!  Again, Mom, you're brilliant.  I’m lucky to have a teacher for a mother! :) 


I totally recommend this for younger kiddos.  You don’t even have to use new books.  My Mom gathered up some books she had from when my brother and I were younger {works out in my favor that she saves things!} and then she purchased a few at the book fair at her school.  


The books are just wrapped with simple plain paper with a big number written in marker on the top.  


Easy.  And, the kid loves it.  LOVES it!


Books are much healthier than candy too!


Mom, you’re a genius!  Thanks for the idea, and the 24 new books!


Friday, December 7, 2012

Printable Holiday Fun!


-->
Life at my house the past few weeks has been interesting, to say the least.  Started off with a short hospital stay for my husband, then once he was back home, our entire house managed to get strep throat.  Not a good two weeks.  Since we were stuck at home trying to all get well again, I was trying to come up with various new ideas for little man to do to occupy his time- and energy.  
 
Fortunately, I had recently received Barbara Feldman’s ‘Printable Holiday Fun, Printable Activity Sheets’ disc in the mail.   I was asked to review the disk, but it couldn’t have come at a better time! The ‘Printable Fun’ disk full of various activities sheets, coloring sheets, word searches, etc. for just about every holiday!

Oh yes, you better believe I printed some of those sheets out!

When I inserted the CD I was surprised by how many different documents there were to choose from!  I figured that since Thanksgiving is the next holiday coming up {this post is a little late!}, I’d print out a few Thanksgiving related sheets. 

Little man isn’t big on coloring or doing sit-down activities unless he is in a certain mood.  But, once he did sit down to ‘work’ on the sheets, he colored for a little while and enjoyed the activities.

About a week later, some of little man’s friends came over for a bit while their Mom attended parent-teacher conferences.  One of the kiddos- who happens to be a girl- is very into drawing and coloring.   She was thrilled to have some of the worksheets to color while waiting for her Mom!  A perfect activity for her!


Now, with Christmas rapidly approaching, I’m planning to print out the various Christmas worksheets and giving them to little man during ‘quiet time’ or for a good rainy day activity!

I totally recommend this disk.  When you need an activity for a rainy day or want your kiddos to do something, this is great!   With Christmas coming up, this could be a good gift for a friend with kiddos too!

You can check out Barbara Feldman's site here!

Wednesday, December 5, 2012

Creating a 'New' Scarf - DIY Dyeing

-->
Supplies Needed:
Dye
Fabric/ item to dye
Salt
Gloves
Metal or glass bowl (or you can use your washer!)
Warm Water

I’ve been on a bit of a fabric dyeing kick lately.  I keep looking in my closet to see what I could dye for a new look.  I dyed a silk dress a few weeks ago (post coming soon), but most recently I wanted to see what I could do with an old scarf. 
  
I picked up a box of Rit dye at the ol’ fabric store.   
Little man helped me pick the color.  He chose navy.


I followed the directions on the box of dye, mostly. 
The directions recommend using a washer to do the dyeing. I have a front load washer and I’m not so sure how it would work, or if I want my washer filled with dye so I opted to use a big glass bowl filled with warm water {maybe not the best technique, but it worked!}. Have you ever used a front load washer to dye clothes? If so, how did that work out for you?
I filled the bowl with warm water, put a little salt in the water, and then sprinkled some of the dye into warm water.   
I soaked the scarf in warm water and then put it into my bowl filled with dye. 
I mixed the scarf around in the bowl with a metal spoon. 
I left the scarf in the bowl for about two hours, mixing around occasionally. 


*Word of advice, when mixing around the content in the bowl, the dye splatters a bit … my off white counter tops now have evidence of my dyeing experience.  Ooops! 


When I took the scarf out and washed it, I didn’t love the way it turned out.  It wasn’t as rich of a color as I’d hoped.  So, I put the scarf back into the bowl of dye {after getting the entire thing wet with warm water} and let it soak again for a few hours.   I didn’t even mix it around much, I just let it sit and soak up the dye.  

The second time around did the trick; the scarf came out dark bold navy.  Perfect!

I am happy with the way it turned out!  What do you think?

Have you ever dyed anything?  Any tips you want to share?

Sunday, November 18, 2012

13.1 Here I go!

-->

The race starts in less than two hours.  I’m sitting at my computer eating oatmeal and trying to ignore the major butterflies I have in my stomach.   I’ve done this before.  I’ve run several half marathons, why am I so nervous?

I get nervous, I do know this about myself, so I shouldn’t be surprised.  I get nervous for myself and I get nervous for others.  I think I was even MORE nervous for my younger brother last year when he was running his first marathon and trying to qualify for the Olympic trails. 

Race day is finally here.   I know I can run.  I know I will finish.  It is the anticipation of what I’ve been training for the past few months.  It is the hope of finishing with the time I want… but not knowing if being sick and not training for the last two weeks will hinder that.  It is the unknown of what the weather will do.  The weatherman is calling for rain.  I’m hoping he is wrong.   I don’t mind running in the rain.  I mind racing in the rain {sort of ironic I guess, since my times aren’t much of ‘race’ times}.   It is the thoughts of ‘did I hydrate enough?’  ‘Did I eat the enough of the right foods?’  ‘Did I avoid the wrong foods?’ Did I? Did I? Did I?...  guess there is only one way to find out. 

Bring it on half marathon!   


Friday, November 9, 2012

Thanksgiving Fall Wreath Tutorial

-->


Supplies Needed:
~ Styrofoam Wreath {can be found at any craft store}
~ DMC floss, various colors
~ Burlap or any fabric, cut into strips roughly 2” wide
~ Felt, various fall colors
~ Fabric flowers {mine are made of felt and silk}
~ Needle
~ Pins

Cut burlap into strips, roughly 2” wide.  My strips were about two feet long, so I needed roughly four strips of burlap.  


Then take the strips of burlap and wrap them around the wreath, overlapping as I went along.  I used pins to make sure the ends of each piece stayed in place. 

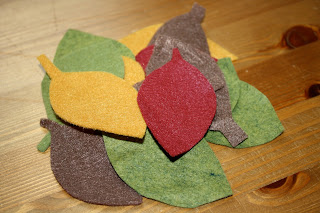
Next step, and the most time consuming part, making the leaves.  Cut leaves from the various colors of felt.  Depending on how many leaves you want on your wreath will determine how many you’ll need to cut.  I used about 20 on my wreath.


Take your first color of DMC embroidery floss and cut a piece {I cut about 15 inches}, thread it into your needle, then tie a knot at the non-threaded end.  Starting from the backside and bottom of one leaf, push the needle and thread through.  Put the needle back through the felt leaf roughly ½ centimeter up the side of the leaf.  Continue this process all the way around the leaf.  Tie a knot at the end, cut the remaining thread, and start the process all over again on the next leaf.  


Making the fabric flowers {you can skip this and leave the flowers off the wreath to save more time}.  HERE is a fabulous tutorial on how to make fabric flowers by Tatortots and Jello.

Once you have ‘decorated’ all your leaves and created your flowers, you’re ready to finish the wreath!

This is the fun part {but also the part that took me the longest- cause I couldn’t make up my mind!}  Take the felt leaves you made and lay them around the wreath however you like.  Place the fabric flowers on top of the leaves.   I put the majority of mine on one half, and three on the opposite side.    Once you have the leaves and flowers where you’d like, you can use pins {or glue, or whatever you’d like} and stick the leaves and flowers in place.  


And… done!  You have a fun and festive wreath for fall and the Thanksgiving season!


What do you think of this wreath?  I'd love to hear your thoughts! 

Wednesday, November 7, 2012

Thanksgiving Fall Wreath

-->

Now that Halloween is over, and the pumpkins are {mostly} put away, I wanted to make something festive for the Thanksgiving season.
Since I often choose to spend time creating something fun and new, instead of doing things I probably should be doing {housework can wait, right?!}.  I decided the empty space on the wall needed a fall wreath.   

Fortunately, I was able to use supplies I already had on hand.  I’ve had the styrofoam wreath for a while, waiting to be used for a project.   I used burlap, felt scraps and DMC floss I had left over from various previous projects.  

Some left over supplies, a little time and viola!  New wreath!  The little man even told me he ‘loves it!’- huge compliment for sure!!


I think it might be missing something…or have too many leaves.  What do you think?  Do you think it needs anything else?  What would you add/ take away?

Easy tutorial coming soon!

Monday, October 29, 2012

Nothing!

-->
 The only 'costume' little man has been caught in!  One of my favorite pics!

At my house, the little man won’t be dressing up for Halloween this year. 
He didn’t dress up last year either.

No, we aren’t against Halloween.  This has absolutely nothing to do with our influence.  Little man just wants nothing to do with it.  If you ask him – which people do regularly – what he is going to be for Halloween, his automatic response is ‘nothing.’  He doesn’t get upset, or embarrassed, he just simply states, ‘nothing.’ 

The practical side of me is actually happy he isn’t into the dressing up part.  I don’t have to make a costume.  I don’t have to buy a costume.   

The crafty side of me really wishes he wanted to dress up as something so I could get all creative and make him a costume.  But he wants nothing to do with dressing up.   

Maybe next year he will change his mind.  Maybe not.  Either way, he is my little man and I want him to be who he is- costume or no costume.    I want him to be true to himself and not let others influence him.  Even if it is as basic as not dressing up for Halloween. 


Thursday, October 25, 2012

Welcome Home Ranger!

A big smile is on my face as I type this.   Another military family is ‘complete’ once again.  Another solider returned home, safely!

One of my best friends had me make three ‘Daddy is my Hero’ shirts for her sweet kiddos to wear at the Welcome Home ceremony for her husband.  


Looking at these pictures, I can’t help but grin knowing how happy they all must be!

Welcome Home Ranger! 

Thank you for doing what you do and serving our country! 

Rangers Lead The Way!

Wednesday, October 24, 2012

HankOrange is famous!

-->
Well, maybe not famous.   But, there is a chance that HankOrange will make a television debut!   Two adorable little boys will be wearing shirts created by HankOrange and they will be on TV. 


Let me explain.  A while back a lady contacted me about making some ‘welcome home’ shirts for her two boys.  I was excited she chose HankOrange to make special shirts for her boys.   After a bit of back and forth conversation, I learned that her husband’s Army unit was coming home from a year deployment, the following week!  Excitement!  I also learned that their unit was a part of a new television series,  “Married to the Army: Alaska.”   

Photo courtesy of Jen Hammer Photography

I was thrilled.  First of all, Welcome Home ceremonies are a big deal and I get excited knowing that I’m making special shirts for little ones who will soon be reunited with their Daddy.  Second, I was super excited thinking that HankOrange shirts could possibly make an appearance on this new TV show! Yeah!

Photo courtesy of Jen Hammer Photography

So, if you’re as curious as I am if HankOrange creations will be on TV, you can watch the premier of  ‘Married to the Army: Alaska’ on November 18th…   You know I’ll be watching! 
To see a preview of the show, go here!  And another preview, here  

Thank you Sara for choosing HankOrange to be part of your very special day.  

The day your Hero came HOME! 


Photo courtesy of Jen Hammer Photography


Thursday, September 27, 2012

Monsters!

-->

It is once again that time of year.  The weather starts turning colder, leaves start changing colors and falling off the trees, days get shorter and nights get longer. 

This can only mean one thing- fall is here!  And what goes with fall?  Monsters!  Well, maybe not.  But when fall arrives, Halloween comes shortly after.  And monsters do go along with Halloween. 

I can’t say that I love all things Halloween.  I don’t like the scary and frightening aspects associated with Halloween, but I do enjoy the creative aspects that go into decorations and costumes!  

One of my favorite things to make is a ‘monster’ shirt!  The HankOrange ‘monster’ isn’t in the least bit scary.  The HankOrange ‘monster’ is fun and playful! 


The ‘monster’ is sewn using a ‘freestyle’ technique that leaves raw edges of the fabric showing.  When washed, the edges fray a little creating a unique and fuzzy look.


I’ve made boy monsters and girl monsters, twin monsters and brother monsters.   I’ve also made a ‘monster’ pillow.  I think they are so much fun!  Maybe the next ‘monster’ I make will be for a little ‘monster’ you know?!  

Get your lil’ monster their own shirt HERE.


Thursday, September 6, 2012

Let The Games Begin!

As we know, this summer hosted the 30th summer Olympic games.   This summer also marked the fifth birthday for my friend’s little boy.  

And, what could be a better theme for his birthday party than ‘Olympics’?
Little boys, a little competition, lots of running around to burn off energy- sounds like so much fun!

The birthday boy’s Mom asked me to create some ‘Olympic’ headbands/ sweatbands for the party to give as party favors.  Such a great idea! 
Last year I made these headbands for a sports themed birthday party, but I think the Olympics theme is super fun!


Happy Big 5 Brady!


Thursday, August 16, 2012

Welcome Home


Welcome.  Home.  The two words are simple.  But when combined together, their meaning is powerful, Welcome Home. 

The words might not mean much to you, but to me, the two words are what you look forward to saying for months.  They could be two of the sweetest words you could ever hear.  ‘Welcome Home.’

Those two words can also bring on lots of emotion.  I associate the words with deployment.  When I hear ‘Welcome Home,’ I often get goose bumps thinking about a soldier who is about to be reunited with his or her loved ones after a lengthy separation.  And by lengthy, I mean months.  And lots of them. 

Much preparation goes into ‘welcome home’ when welcoming home a loved one from a war zone.  You count down the days.  You think about what you will say, what you will wear, and what it will be like to finally be reunited. 

The reunion.  What you look forward to from the moment they walk away from your family, and almost every moment they are gone, until the day they return.

As a military spouse, I’ve been honored to attend several Welcome Home ceremonies – for both my soldier and several for friends returning from the war zone. 

I’m honored that HankOrange has been asked to create special ‘welcome home’ shirts for both boys and girls.  I get goose bumps every time thinking about a little one getting to see his or her Daddy (or Mommy) very soon!  What an honor it is!

Thank you to those who have trusted HankOrange.  And a much bigger Thank You to those who have severed and continue to serve our country.   

Welcome Home heros!


LinkWithin

Related Posts Plugin for WordPress, Blogger...