Thursday, February 12, 2015

Easy Valentine’s Heart Banner


{Quick & Easy Tutorial}

I got a {fancy} new cutting machine.  It is a Brother Scan n’ Cut.  I got it back in December.  The thing sat in the box, on the floor, for a good month before I was brave enough to even take it out of the box.  Why do these machines intimidate me so?! 

Anyway, I wanted to make a fun {and easy} little banner for Valentines Day, so I figured it was time to get to know my Scan n’ Cut.  One main reason it sat in the box so long was because I was waiting to take a class {yes, a class!} on how to use it. 

Even after the class, I still waited a bit to use my machine.  I’m not really sure why.  The thing is amazing.  All that to say, I used it to cut out my felt hearts!  It saved a lot of time.  And, all the hearts are exactly the same size and shape!

I used some white wool felt I already had and cut out a bunch of little hearts.  I then took some red DMC floss and ‘stitched’ through each heart.  One by one until they were all on the string. 

Voila!  New banner!  Super easy.  Well, super easy when you have a machine cut out all the hearts for you.  I probably saved hours by not having to cut them out individually!

{Supplies}
Wool felt
Red DMC floss
Needle
Scissors


Cut. Thread. Stitch. Done. 
Really, that easy!
Cut out the hearts out of the felt.  

Put some DMC floss onto a needle and ‘stitch’ through each heart one by one.

When you’ve used up all the hearts, you’re done! 


So, so easy!
Hang it up and spread some love!


Wednesday, January 21, 2015

Put A Sweater On It!

‘Warm Up’ a Pillow
Turn a sweater into a {super easy} pillow cover
{{Easy Tutorial}}

I have always liked the look a ‘knit’ pillows. I’ve wanted a ‘knit’ pillow for a while.
Something about them makes me think of curling up on a couch under a warm knit blanket on a cool fall morning or a cold winter night with a mug of freshly made coffee or hot chocolate!

Warm and cozy. 

Whenever I see ‘knitted’ looking pillows in stores I think, ‘I need to try that!’  No, I can’t knit {one day I’ll learn!}.  But I do know where to find a knit sweater and I know I can turn a sweater into a knit pillow!

I have had this project on my to-try list for a long time {probably years, sigh}.
I’ve held onto a dark brown sweater I don’t wear anymore, specifically to do this project.  Because it has buttons down the front, and is slightly long, I knew it could work to cover a pillow!   And, finally, I got around to making it!

Turns out, it was the fastest pillow cover I’ve ever made!

Supplies Needed: 
Pillow {or pillow form}
Old Sweater with buttons down the front {important!}
Sewing machine {or serger}

First, You need a pillow and a sweater {with buttons!}

Know the size of the pillow you want to create a cover for and make sure your sweater will fit over the pillow.  If not, get a smaller pillow. 
Turn the sweater inside out and pin all sides together.   If the sweater ‘fits’ the pillow snuggly on the sides, you can leave the seams and just sew the top and bottom!  Pinning the sweater sides together will help make sure the knit sides wouldn’t move while sewing.


Sew {or serge} the sides together.   Because of the buttons, you can sew the entire sweater and you don’t need to leave an opening to turn right side out. 


Turn right side out.  Put over pillow form to make sure it fits.  If it doesn’t, sew new seams.  For me, the top of my pillow was too loose, so I re-sewed the top seam.  
Cut excess fabric {sweater} off, turn right side out.  Put pillow in.  Button it up.
Now you have a new pillow!   
How easy was that!?
*Bonus, my little man is enjoying buttoning and un-buttoning the buttons.  He says he ‘likes the practice’ – Double win!  

Tuesday, January 13, 2015

Embrace The Suck


Embrace The Suck Shirts
{How it all began}


It all started as a bit of a joke.    
Well, at least the idea of an actual shirt started as a joke.  The concept of ‘embracing the suck’ wasn’t a joke at all.  
In September, my military husband, found out he was going to deploy… and probably within a few weeks.  This came as huge surprise. 
As with any deployment, many preparations have to be made, and when his departure date was so quick, life got crazy.    And quickly.   Many plans had to change and many new plans and arrangements had to be made.

I said to another fellow spouse, in an effort to lighten the mood, this will suck.  We just need to ‘embrace the suck.’
And so it began.  Embrace the Suck. 

What started as an attempt to bring a smile to a fellow military spouse, turned into a regular statement we’d throw out.  And then I had the crazy idea to make the ‘embrace the suck’ club shirts.    I randomly posted on Facebook that I might make shirts and the feedback and the number of other people who would want one surprised me!   The response made me more excited to make the shirts.  And, it made me realized that everyone has their own story to ‘embrace.’ 

And the shirt production happened. 

Sometimes life doesn’t go as planned.  You just gotta embrace it.

When the workout you’re doing makes you feel like you can’t push any harder.  Embrace the suck.

When you want so badly to spend time with your best friend, but she lives on the opposite coast.  Embrace the suck.

When you find out your husband is deploying.  In two weeks.   Embrace the suck.

When you learn your family member has breast cancer.   Embrace the suck.

When you read that your friend {with a newborn baby} just had a stroke.  Embrace the suck. 

When you hear your friend’s Mom passed away suddenly.   Embrace the suck.

When you’re going through a tough situation. Embrace the suck.

When you just need to call it like it is. 'Embrace the Suck'

Sometimes, three words can sum it up.
Embrace. The. Suck
What’s your story?  
How do you 'embrace' what life throws at you?


Get your shirt HERE!  {Available in Men's and Women's}

Thursday, July 3, 2014

Celebrate Independence


{{Quick and Easy tutorial}}


My mantle needed a new look.   
Since Independence Day is coming up, I figured I could change things up with some red, white and blue.  Why not get a little patriotic?

Bring on the Red, White, and Blue!
I didn’t want to go overboard with the decorating, but I did want to focus on the red, white and blue.

I wanted to make a {quick and east} ‘flag’ banner for the mantle.  I already had red felt cutouts {that I started for Valentines’ day-obviously didn’t happen!} so I figured I should use those!  I wanted to add another layer to the red, so I found some fabric {sparkly and star} from my fabric stash that I thought could work. 

Here is a Quick and Easy tutorial for the banner!

Supplies: 
Red Felt
Fabric of choice
Ribbon
Sewing machine/ Thread
Scissors
{optional} Heat ‘n Bond iron on backing


To make a pattern for your banner ‘flags’, I cut 4” x 6” rectangle from a piece of paper, folded it in half, and then (starting on the non-folded side), cut from the bottom corner diagonally up and ending roughly 2” from the bottom of the folded edge.


·      Trace the ‘flag’ pattern you made and cut out a second pattern.  Now we will make the second piece to the pattern.  Taking the second piece, cutting along the NON folded edges, cut off roughly 1cm on both the angle and the straight edge.


·      Starting with the felt, cut out the number of ‘flags’ you want for your banner.
 {Optional} With the fabric, iron on the ‘heat ‘n bond’ to the back side of the fabric.  Make sure you have enough of the backing to cover fabric to cut out enough of the ‘flags.’
·      Next, cut out the smaller size ‘flags’ with the fabric.
·      If used iron on backing, peel off back and iron onto the felt pieces.
·      Sew the fabric onto the felt.  *Not necessary if iron on backing used, but I did to create a more finished look.
·      Take ribbon and pin the ‘flags’ on ribbon.  I left roughly 2inches between ‘flags.’


·      Cut excess threads.
Done!  Hang up your flag banner! 

   And, celebrate Independence Day with a new 
{red, white and blue} banner!

Happy 4th of July! 

Monday, June 2, 2014

Wrap it up!


Pillow Wraps 
{Pillows - with a twist!}

A while back I wrote about my sewing machine I call ‘Pillow Maker’. 
Well, ol’ Pillow Maker is back to doing what she does best.  Making Pillows.  Sort of.   

I’m trying something new - pillow wraps!

‘Pillow wraps’ are basically a band that goes around a pillow.  I love the idea of wraps because you don’t have to get an entirely new pillow in order to change up the look.  You can add the ‘wrap’ to any pillow. 

I liked the idea of a wrap, so I thought I’d give it a try.  This is the first attempt at a pillow wrap. 
I made it reversible- One plain side.  One patterned. Options are always good!
Both sides embroidered with a word.  


‘Sunshine’
‘Smile’
Who doesn’t love a little sunshine, or a smile?!

I love the combination of the two patterns- patterned pillow with patterned wrap.  But I also like the plain side because it causes the embroidered word to show more. 
And, the chevron pattern looks great on a plain colored pillow too. 
Endless options! 
 
The hardest part is deciding which pillow to put the wrap on and which side of the wrap to have showing!  Fortunately, because the wrap can easily be taken on and off, you can change it as often as you’d like.   
Which I do.  Almost daily! 

Pillows, with a twist!
{Coming soon to the HankOrange shop!}
 
If you could have a word on a pillow wrap, what would it be? 

Monday, May 26, 2014

Half way. Where does the time go?


Once upon a time there was a little boy.
He made his grand entrance, not by choice, but by force.    
And he arrived at a whopping 10lbs.  Ten pounds of pure boy. 

And that sweet boy I held in my arms for the first time 5 ½ years ago just finished his last day of pre-school.  
And today, he is halfway to turning six.  SIX!  What?  
And at the end of summer, he will start kindergarten.

And I’m sure in the blink of an eye he will be graduating high school. 

That boy has always been my ‘little man’.  Today, marks his half birthday. He is halfway to turning six.  SIX!  What?  
My little boy is literally becoming a little MAN. 

How did that happen?
Where did the time go?
 
Happy half birthday to you, Little Man.   Today, we celebrate you.
You make me so proud to be your momma.


Tuesday, May 6, 2014

Cupcake Wrapper 'Flower' Wreath

Cupcake Wrappers + Pins + Fabric = New Spring ‘Flower’ Wreath
{Quick and Easy Tutorial} 


Supplies Needed:
Cupcake wrappers  {I used white, but any color works!}
Felt {or fabric} strips
Foam Wreath
Pins
Ribbon or another strip of fabric {to hang}

I wanted something new and spring-ish to hang over the mantle.   
And, I didn’t want to spend a lot of time creating it. 
I think this wreath took me less than 30 minutes from start to finish and hanging over the mantle! Perfect.

I had a styrofoam wreath from a previous Christmas project that was already wrapped with felt.  But, the process to cover the wreath is quite simple.
I cut strips of felt roughly two inches wide and then wrapped them around the wreath until the entire thing was covered with the felt/ fabric.
See tutorial and instructions here

Once the wreath is covered with the fabric, you are ready to add some ‘flowers’

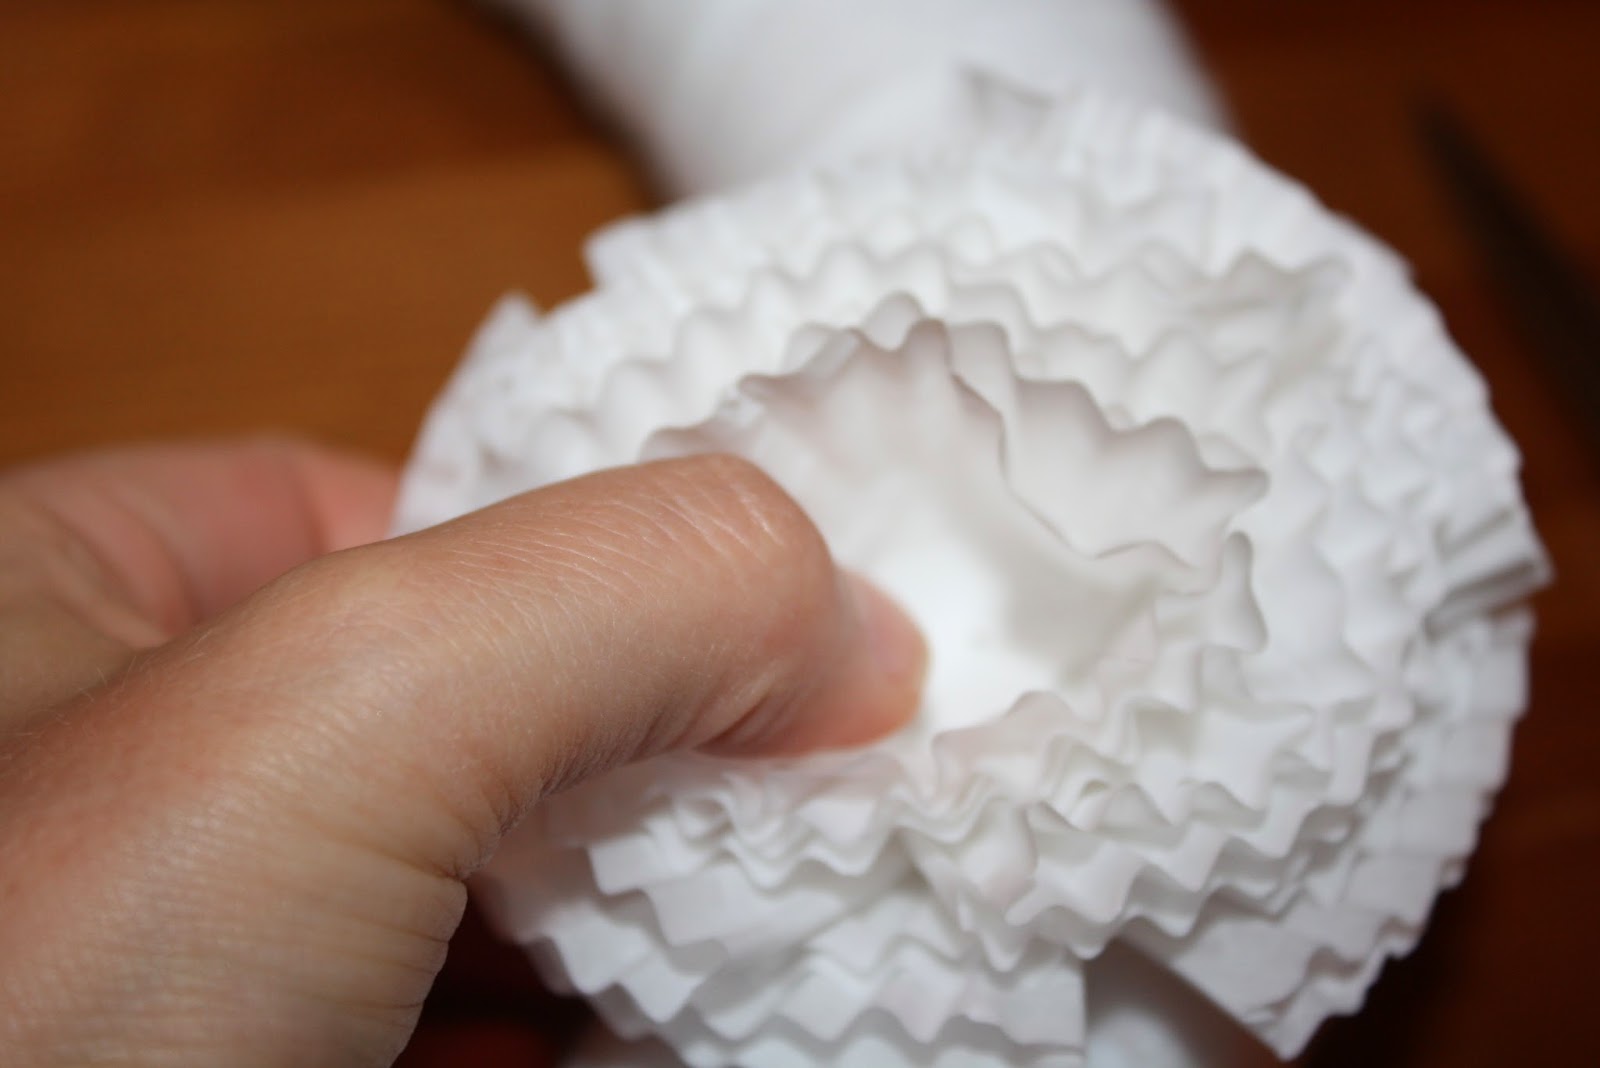
Take the cupcake wrappers out of the package and fold in half, then half again {basically creating a triangle shape}.  Continue with the other cupcake wrappers until you have the desired amount.  I think I used 40 wrappers. 


Once you have a pile of folded wrappers, pile them on top of each other. 
Push a pin through. 


Then move/ arrange the wrappers into a ‘flower’ shape.   The more you use the bigger the ‘flower’ {and the harder it can be to pin onto the wreath!} 
I think I used roughly 8-10 wrappers per ‘flower.’   
Pin onto wreath. 


Continue creating ‘flowers’ until you have the desired look.
I put three ‘flowers’ on one side and one on the other.


Take ribbon to tie around the top of the wreath in order to hang it from the wall.  I used a strip of white and orange polka dot fabric because I wanted to add a hint of orange {of course!!} to it!  


I like the way it turned out. 
Simple.  Neutral.  Fun.
And, it adds some springtime cheer to the mantle.

*Need to get a photo of the wreath actually hanging on the the wall above the mantle!*

Next time I might use a bright and bold fabric with a pattern to wrap around the wreath.  Or brightly colored cupcake wrappers.  Or both!

What do you think? 


LinkWithin

Related Posts Plugin for WordPress, Blogger...